To make sure that there is no confusion during the Marking procedure, here is the Online Store Link…
- James L
To make sure that there is no confusion during the Marking procedure, here is the Online Store Link…
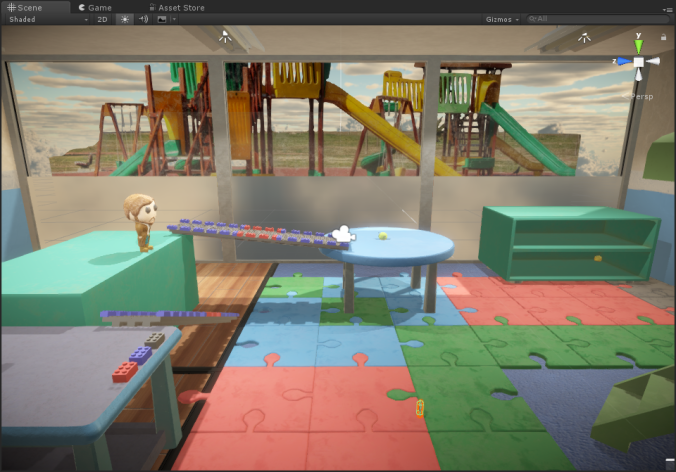
Today is the hand-in day for our project and there are some small final things to do before it can be submitted, these things are the music as well as new objects and a different sky-box.
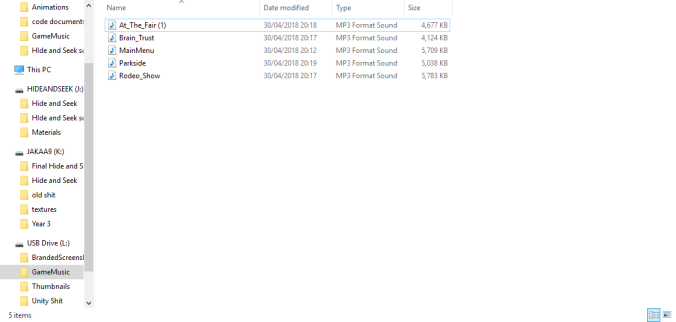
James had provided 5 pieces of music, 1 for the main menu and 4 for the main level, as a group we listened to the 4 pieces of music for the level and decided that the Brain_Trust is the one that we should use as is sounds more fitting for the scene.
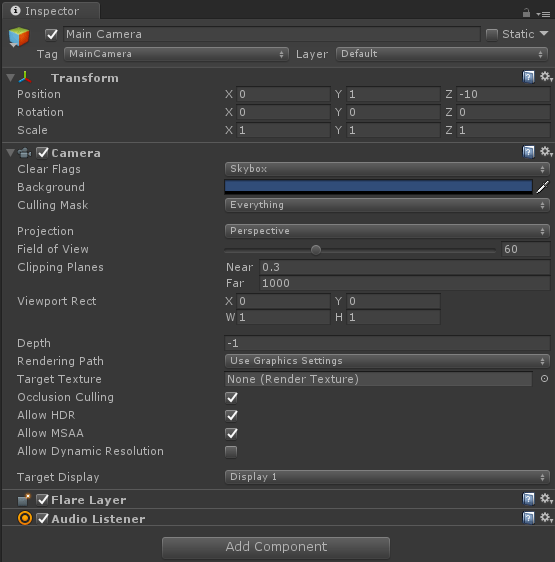
Placing the music is a simple process, all you have to do is attach the music to the main camera and when you play the scene it will automatically play the music, if you want to apply multiple pieces to a single scene then you would need to provide some code to specify what music as well as where and when it should change, I felt that if we had a little more time then this is something we would have implemented.

For the sky-box we had a reasonable array of options for it, one of them didn’t turn out so great and ended up looking like a black void.

along with the skybox, James had provided a piece of background to hide behind the window to provide some scenery.

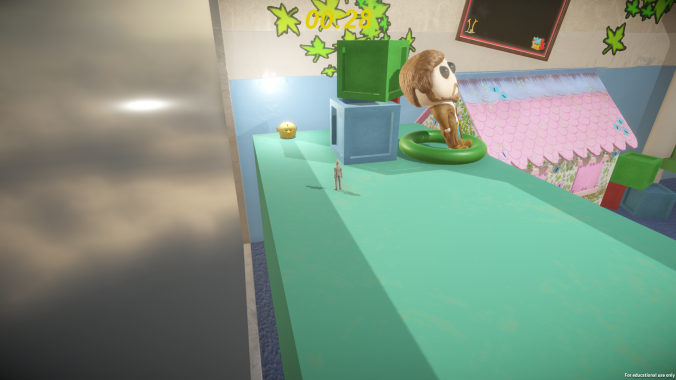
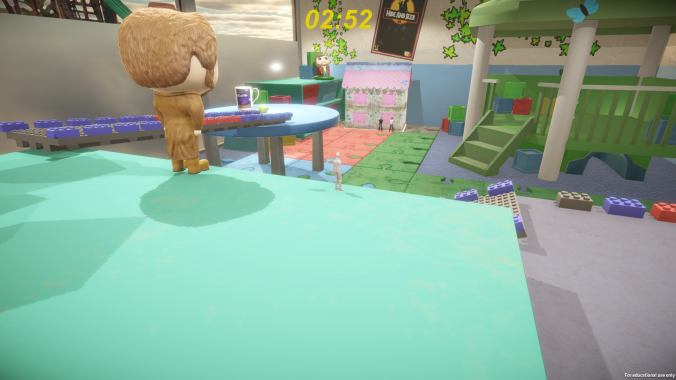
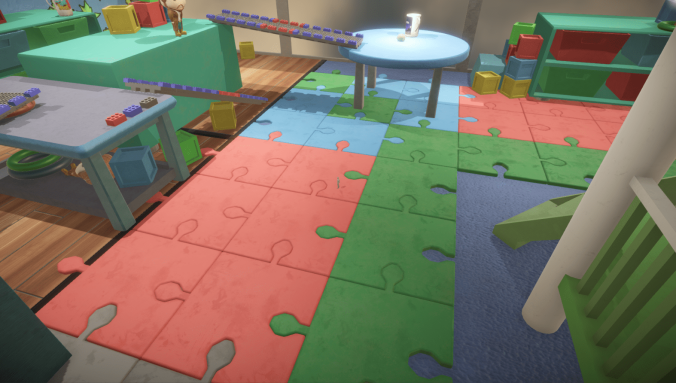
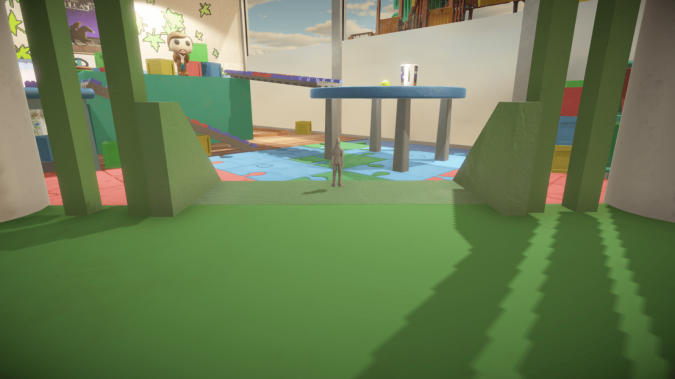
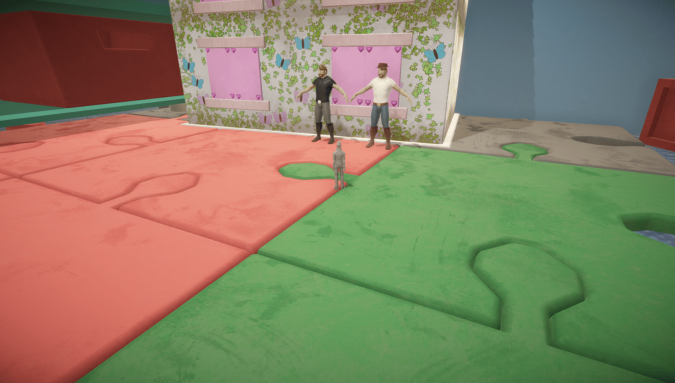
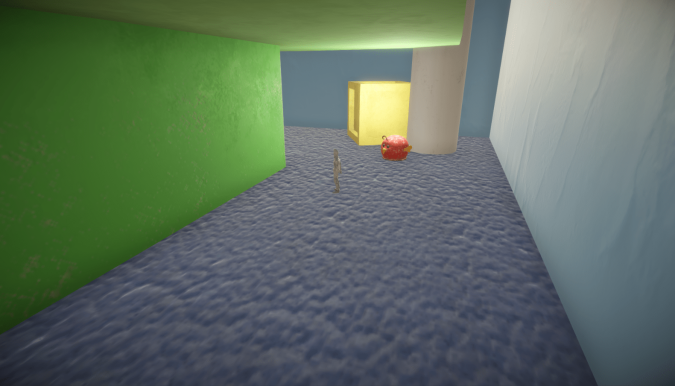
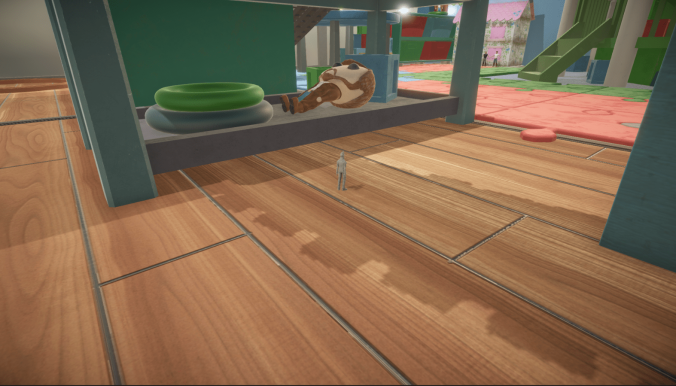
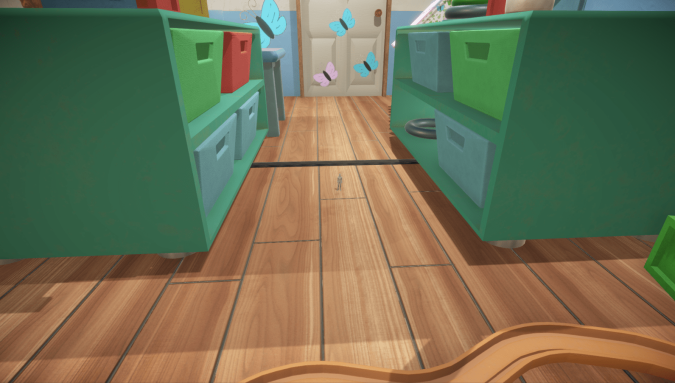
Screenshots of final build:


Reference of Music Used Within The Game –
YouTube. 2018. Brain Trust – Wayne Jones – YouTube. [ONLINE] Available at: https://www.youtube.com/watch?v=AqweWLFKlTk. [Accessed 01 May 2018].
YouTube. 2018. Funny & childish royalty free music – Non Copyright Music – Free Music – YouTube. [ONLINE] Available at: https://www.youtube.com/watch?v=JDJ9p_h2WD4. [Accessed 01 May 2018].
CowBoy Render :
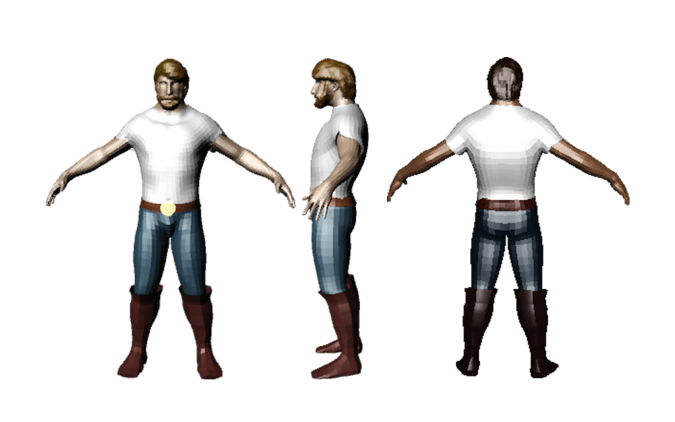
Main colour palette for the cowboy character as show bellow by a front,side and back view of the character.
Bandit Render :
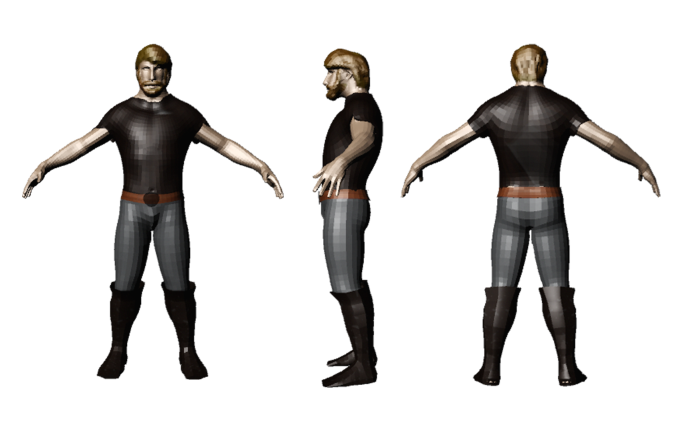
Main colour palette for the Bandit Character as shown bellow by the front,side and back view following from the main character above.
Hat Render :
Garment render of the cowboy hat for the main character to wear within the game it self, as spoken about in previous blog post i had trouble with allowing this to flow properly when animating the character so it does not look like it is just stuck on the cowboys head.

Jack Reed (Character Artist)
As spoken about in a past blog post due to the time frame that I had to get this character done I had spoken to the team leader (James L) and come to terms with the time frame and that the second character would not be ready and due to this we agreed on keeping the one character that I had made and with that just create a secondary colour palette, with this it will allow the player to distinguish the difference between the cowboy and the bandit due to the difference in the colour palette.
As for the cowboy having a white shirt, blue jeans, brown boots and a brown hat this would then change in colour for the bandit, For example the shirt would stay the same but would maybe have a variant colour that would be black, as well as this the rest of the character colour palette would be a very grey and black theme. with this it then again allows the player to distinguish the difference between the two character within the game.
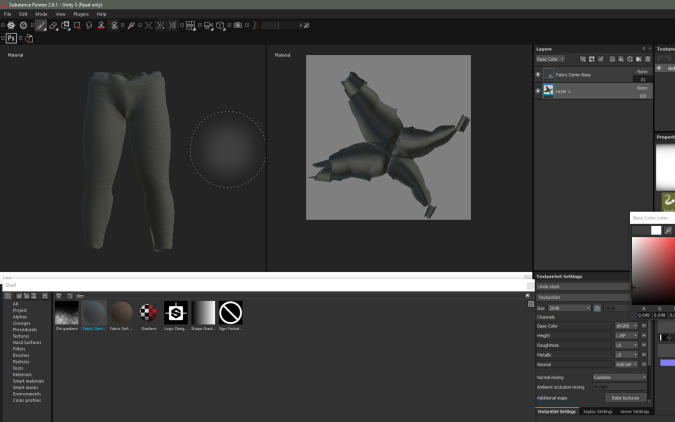
From the images below you are able to see the changes in colour for the second character, as well as images of the changes being made with Substance Painter due to trying to use different textures to make the differences stand out and again make each one different.


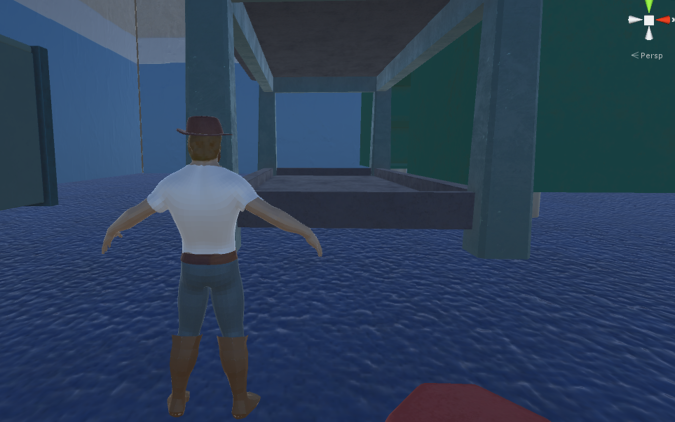
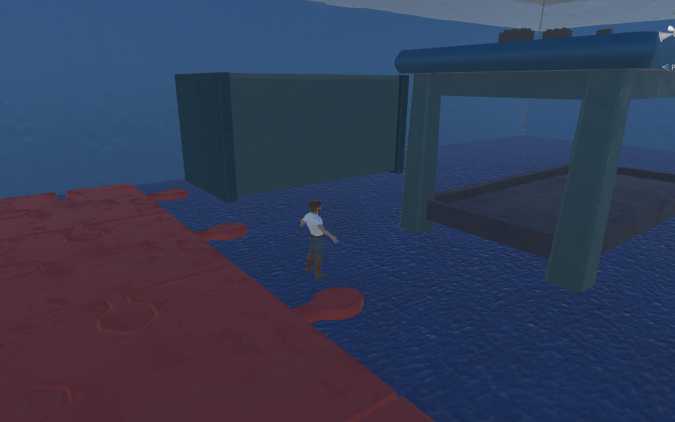
Below you will find a few screenshots of the character in the secondary color palette within the game environment itself so that you are able to get a feel of the difference and how the two color palettes are different.


Jack Reed (Character Artist)
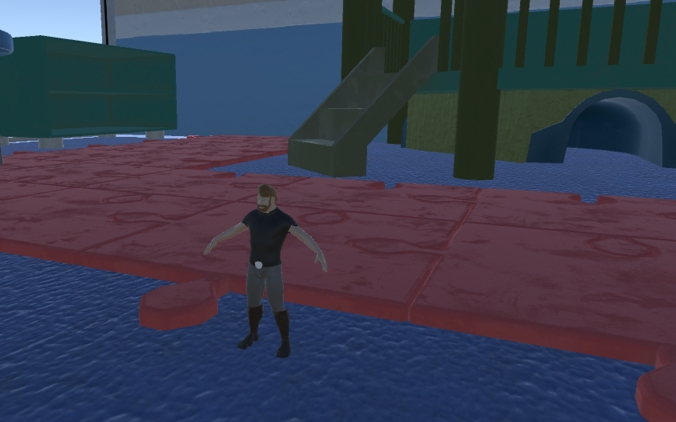
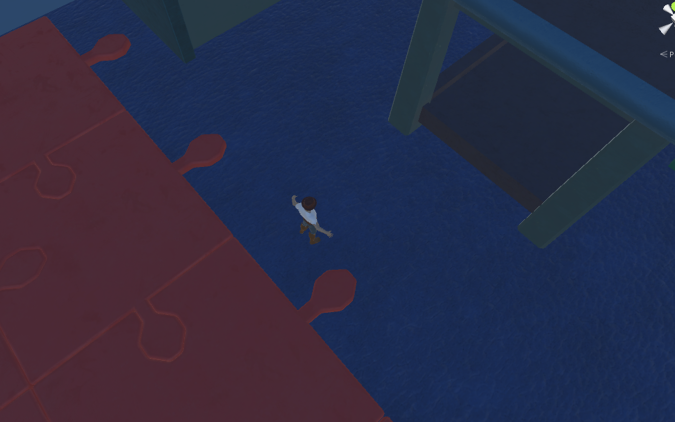
Once I had the complete character and had the animations logged and found the right animation movements for the character I then moved on to going into unity and using the game level file, from this I put the character into the game level as was happy with the way that it fitted into the game world it self along with the textures that I had made for the character, although due to not being able to make the textures glossy within Substance Painter and then making the textures look glossy within Maya this did not stay with the character into unity as you are able to see from the images that are shown bellow of the character all textured as well as implementing the cowboy hat with the character too.
all though I had implemented the character into the game world due to again the time frame that I have had, It was not possible to be able to get the game character ready and working in the scene animation wise, but due to this I have the files that are ready to be put into the scene and work on to make the character work and I have the knowledge of how to make the animation work and run within unity itself for the future of the game to be made playable with the toy character.
as you are able to see from the images below and spoken about in the previous paragraph these are some screenshots that have been taken from within unity of the character within the game level environment.

Jack Reed (Character Artist)
At this stage we are ready to implement music into the Game Environment. It is exclusively Ryan’s job to develop music for the game or at least track down music for the game for us to utilise. He however at this stage has not managed to do this and we need this project completed by tomorrow afternoon.
I decided that I would track down songs for us to utilise so that if Ryan has not created or found any music appropriate for the game, we have these tracks that can be used in place of his. We need music for the Main menu of the game and also three variations of the in game tracks that can be placed throughout the game environment.
If the transition of music however is not possible we will simply use the main in game track as the standard song for the game.
Required Tracks…
- Main Menu
- Standard In Game Track
- Western In Game Track
- Climbing Frame In Game Track
Below is some of the royalty free tracks that can be used for the above purposes…
Main Menu…
Standard In Game Track…
Western In Game Track…
Climbing Frame In Game Track…
All of the above songs were chosen due to how their rights states that all of the above songs are labelled for reuse and as such does not require clearly referencing of the song owner inside of the product; this in turn makes it so that we do not have to add any additional GUI Information to the game.
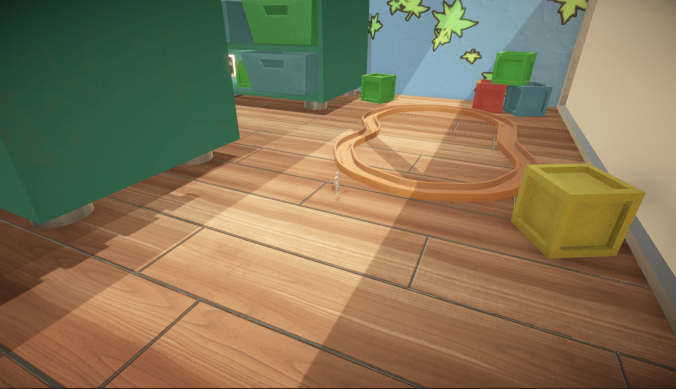
With the environment done I decided to created three more assets that could be dotted around the map to help to make it feel more lived as currently it was very sparce and empty, so for this I created two toys and a container.


The toys are fairly simple with one being a block and the other a set of hoops and a hoop holder, now as this is a playroom the need for simple toys that a large number can be aquired and are fairly easy to replace is rather important as such their simple design works and fits into the area.
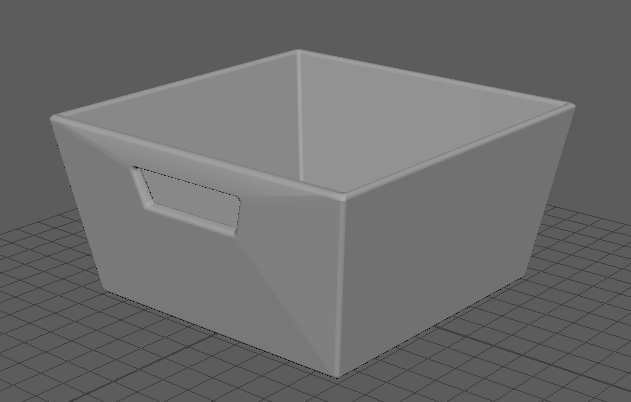
The container again could be simple but I did not simply want a flat square with a hole in the top so I took the base rectangle extruded the top by pusing it down into the model and then thanks to the creation of the walls upon the inside was able to extrude again though this time upon the wall on the side both on the outside of the model and inside was selected and then the extruded part was shurnken down and brought in a little, the faces where then deleted creating the gap in the side which was then sealed up along the edges to create the pull area for the hand, the base of the model was then shrunk down a little to give it this wider top which I liked the look of and it felt more unique.

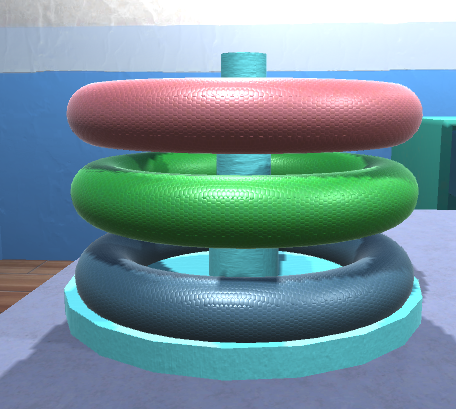
With the base model created I then created several different textures for each of the models this allows for the same model to be used several times while creating a different effect, for in this case the blocks have four textures all of which use the same base material but with it being different and the same for the hoops though the hoop holder uses a different texture as well with it being more of a painted wood look instead.
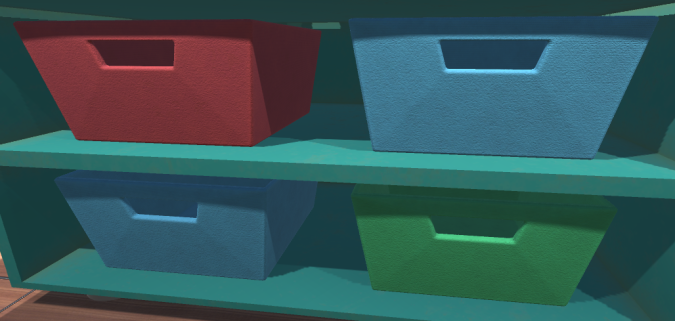
Finally the containers where given a similar treatment with the base material being more of a fabric like look and then three colours being placed on top, this alone helped to make the cupboards or shelfs feel more alive within the room, this can be seen within a set of screenshots posted by another team member which they will post in the next few days.
This will also mark the last model created for the environment and with several additional parts provided by another team member will be the final look of the environment, which im happy with in the past month and a half the environment has gone from it looking like nothing to a fully fleshed out and nice looking area, this is very good for me and for which im happy about as i felt I would not be able to complete it all in time due to having to spend a large amount of time upon another assignment.
So the end product that has been created im very happy with though their are some mistakes I can see here and their like with the playhouses roof, and the opac windows not working as indeed in the end but these are small things which dont pull away from the final products look and feel and with the addition of the small parts being dotted around the map it feels more lived in and like a place that children would play it, which is the end goal for the enviornment creation.
So in conclusion im happy with what has been done but if I had more time I might have been able to make it look much better.
With the Playground asset that I had just developed placed into Unity, I decided to test how this asset would look with a range of Sky boxes. The sky boxes that I test will be used inside of the final game environment and the most appropriate Sky box will be used for the final build testing scene.
I begun by importing a very interesting package that I have been using on my FMP called Sky Series Freebie. This package is full of incredibly interesting Sky Box Prefabs that can be used in any commercial project.
Below is the asset list that I imported into Unity from the Sky Series Asset Package…

At this stage I begun to test any Sky Box prefabs that would be relevant to our Scene; Keeping in mind the childish style of the game I feel that a Sunny or Sunset scene would be most appropriate. A night time scene however could be utilised as a Map Variation in the future…
Below are the five results of the Sky boxes that I tested…

Cloudy Sunny day

Cloudy Night Time

Cloudy Sun Set

Surreal Mid Day Variation

Clearer Sky Mid Day
From looking at all of the images above i have decided that the third image would be most appropriate. I really like this sky box due to how it adds an extra layer of tone and colour to the otherwise flat assets. This piece in turn should bring our environment more to life and will as a result make our world more interesting.
All of the above Sky boxes will be tested in engine and I will ask the team what Sky box they prefer; for now however I feel that this sky box will be the most appropriate and highest quality sky box for use in our game…
Inside of our Game Environment there is large windows that allow the player to look out into what is at the minute an empty world. I decided that I could develop a play ground asset fully with the use of a single plane and transparency.
I initially begun to develop this asset with the use of a large modified Plane inside of Maya. The scale of this asset can be changed inside of the Game Engine so I was not too worried about the assets scale; I did however make sure that the asset was relatively close to a 16:9 aspect ratio; i done this so that large A4 images would be suitable for this asset.

From here I then simply Unwrapped the asset with the use of the Unfold Tool inside of the UV Editor.

Using this assets UV Snapshot I decided to place a Play Ground image into the appropriate position inside of Photoshop. This image will be used as a reference in order to generate opacity inside of Substance Painter. I also could have created the opacity map inside of Photoshop; I opted not to do this however due to how I felt that it would take far too long.

At this stage i then placed all of the required assets into Substance Painter…

With the use of Opacity via the use of a Metal Alpha Blend material I am able to simply cut out all of the information that isn’t required via painting on opacity information onto a New Layer.

At this stage i spent a large sum of time finishing cutting out the Sky from this image. I simply done this via once again the use of opacity and the use of editing the brush scale to cut out certain sections from the imagery.

At this point i then added a Scratched Steel Smart material in order to bring the asset more too life. I was very happy with the results; I don’t need too add a large sum of detail due to how the asset will only be visible in the distance so this effect was be more than adequate.

At this stage i was happy with the results so i exported the textures and placed the asset into Unity in order to test how the asset actually looked. Once again I was very happy with the results.

I will importing this asset into the group Environment on Tuesday. I am very happy with how it looks.
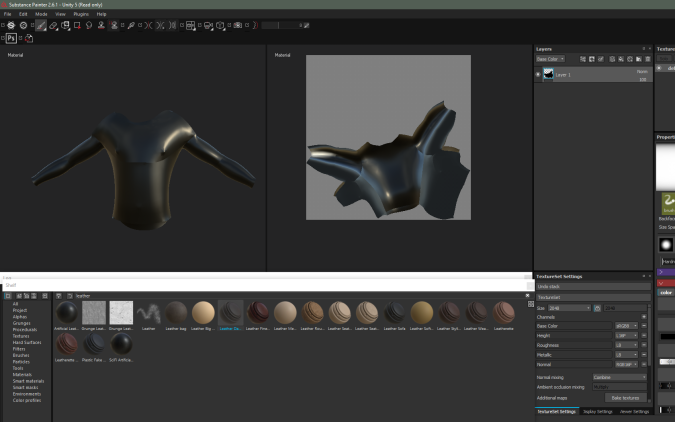
From texturing and working out how to create the textures for the character’s garments and also working out how to create the garments them selfs, I then went and started to re-topologies the main character and then from this I would then unwrapped the character within Maya and then from this I put the character into Substance Painter and start to work out how to create the characters textures.
There are different ways that I could go about creating the characters textures and going bit by bit and trying to get each part on par to what I want them to be and from what I had seen from the research that I had carried out, so for the main base texture of the character for the skin I tried to just do a basic skin colour for the toy but then I thought that I would change the way that I was thinking of doing this by then using the base skin texture that is defult to substance painter.
From this I then went onto how to create the hair, from this there was not an easy way of being able to create the hair as such as giving the character a realistic hair style but from this I just used brown and then from this I used the rust effect to give it a rustic toy feel of what looks like hair, the main referance of creating hair for the character this way was from Woody from Toy Story as he has a very mat but shiny look to his hair in the films and from toys.


From texturing as I have spoken about in a recent blog post I will upload these textures within Maya and from this, I will use a blin or lambert texture and just uploaded the file so this will give the look of gloss to the character and will hopefully make it feel like more of a toy character than just a character, the design of the character is not perfect as i thought that it would be a good design choice as not all toys are perfect and they have paint that not straight and not in perfect line etc. so as this was a design choice that I had seen from researching through characters this was one that stuck with me throughout the process and thought that it would make the toy feel more again like a toy.
(Jack Reed – Character Artist )
