Jamie A. Environment small additions models/textures and final thoughts.

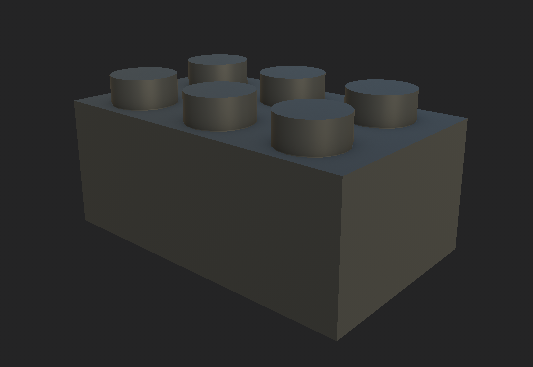
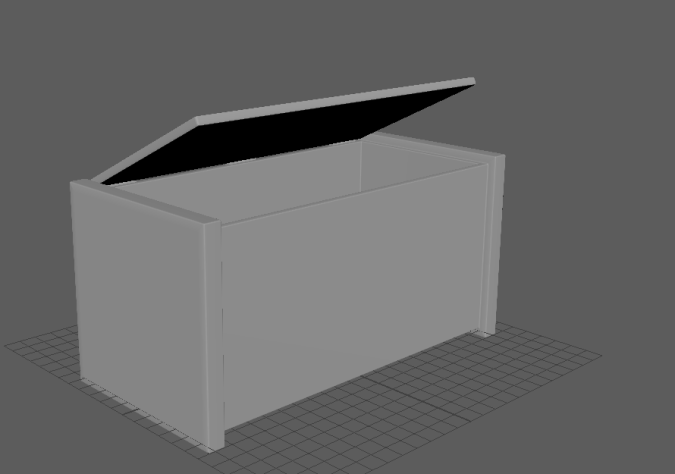
With the environment done I decided to created three more assets that could be dotted around the map to help to make it feel more lived as currently it was very sparce and empty, so for this I created two toys and a container.

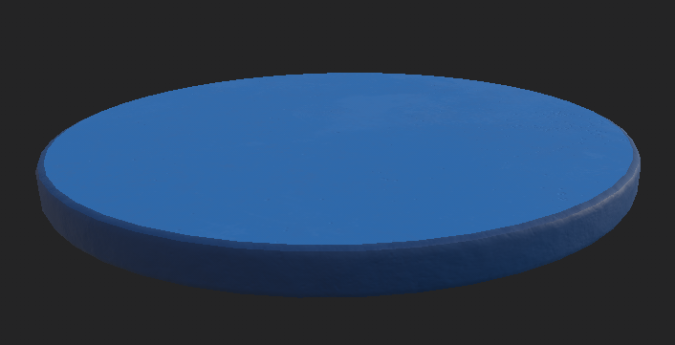
The toys are fairly simple with one being a block and the other a set of hoops and a hoop holder, now as this is a playroom the need for simple toys that a large number can be aquired and are fairly easy to replace is rather important as such their simple design works and fits into the area.

Container

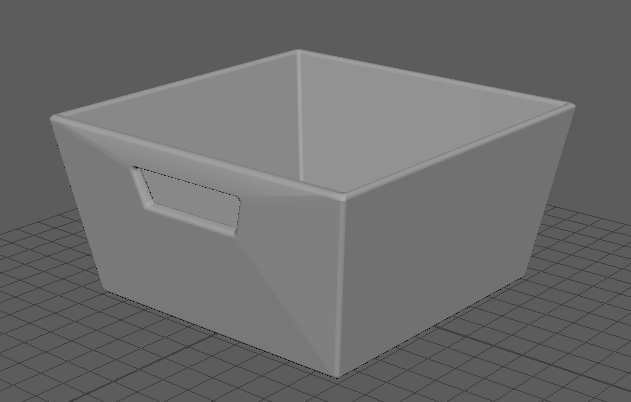
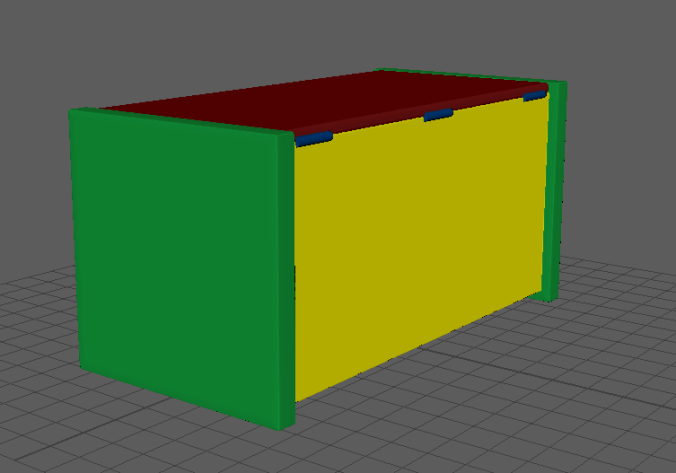
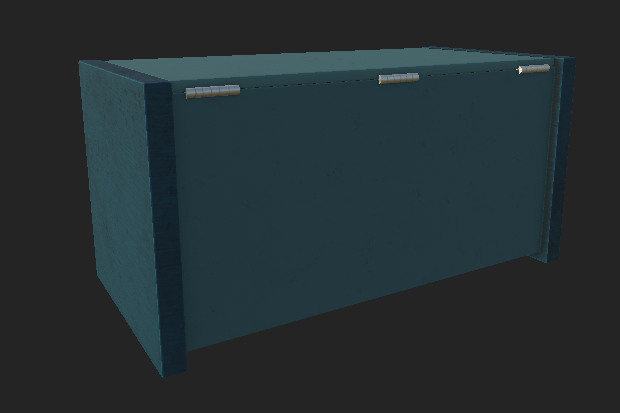
The container again could be simple but I did not simply want a flat square with a hole in the top so I took the base rectangle extruded the top by pusing it down into the model and then thanks to the creation of the walls upon the inside was able to extrude again though this time upon the wall on the side both on the outside of the model and inside was selected and then the extruded part was shurnken down and brought in a little, the faces where then deleted creating the gap in the side which was then sealed up along the edges to create the pull area for the hand, the base of the model was then shrunk down a little to give it this wider top which I liked the look of and it felt more unique.

Blocks_TextureHoops

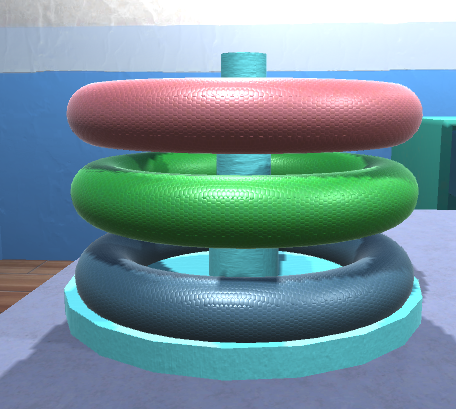
With the base model created I then created several different textures for each of the models this allows for the same model to be used several times while creating a different effect, for in this case the blocks have four textures all of which use the same base material but with it being different  and the same for the hoops though the hoop holder uses a different texture as well with it being more of a painted wood look instead.

Containers_Textured

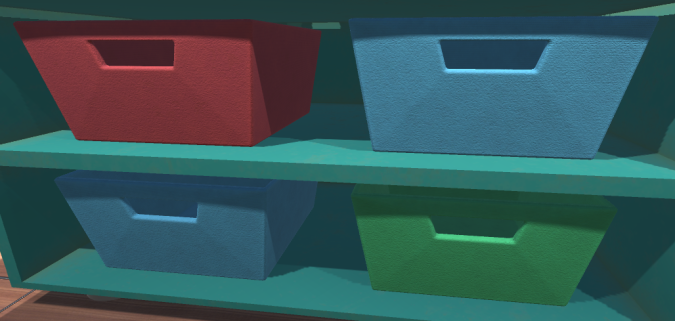
Finally the containers where given a similar treatment with the base material being more of a fabric like look and then three colours being placed on top, this alone helped to make the cupboards or shelfs feel more alive within the room, this can be seen within a set of screenshots posted by another team member which they will post in the next few days.

This will also mark the last model created for the environment and with several additional parts provided by another team member will be the final look of the environment, which im happy with in the past month and a half the environment has gone from it looking like nothing to a fully fleshed out and nice looking area, this is very good for me and for which im happy about as i felt I would not be able to complete it all in time due to having to spend a large amount of time upon another assignment.

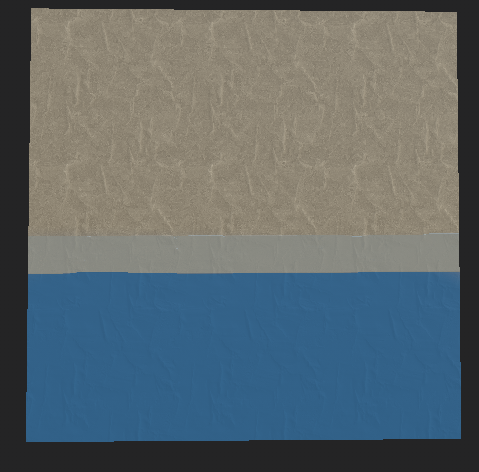
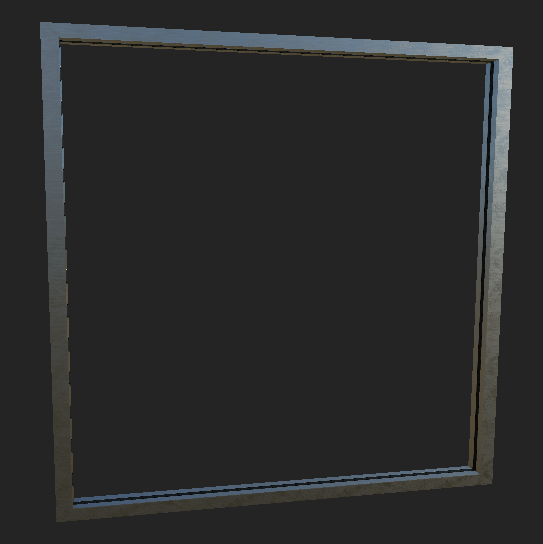
So the end product that has been created im very happy with though their are some mistakes I can see here and their like with the playhouses roof, and the opac windows not working as indeed in the end but these are small things which dont pull away from the final products look and feel and with the addition of the small parts being dotted around the map it feels more lived in and like a place that children would play it, which is the end goal for the enviornment creation.

So in conclusion im happy with what has been done but if I had more time I might have been able to make it look much better.

Jamie A. Environment Ceiling light model/texture.

With the room having been completed I started to look at how to light it, now unity has a built in lighting system so the implementation of the lighting itself was easy but the light effects do not have a actual body to them and are instead just a beam of light as such a model was needed to act as the origin point for the lighting within the room.

Ceiling_Light_Base

For this I experimented a little more with the idea of using the similar method of glass darkening like with the windows and then built a body around it, keeping the glass part seperate and the light and light holders as well, the creation of these model aprts was simple with most starting off as a rectangle that I then either deleted the face off or using the extrude tool to bring the edges of the object down, this can be seen clearly with the main body as I use the extrude on the bottom to make an indent for the bulb and bulb holder to sit in and then extruded the sides to allow for the two side fins to be created, Once the base model was created I then assigned several different colours to the model parts so as to allow for the similar methods that have been used before during texturing.

Ceiling_Light

As this was going to be on the ceiling the detail required did not have to be that extreme and so a simple base mesh of metal for the body, darkening of the glass similar to the windows and making the bulbs bright enough so that they can be seen though the glass, later on while making the lighting system I found I could not implement a method that allowed for the bulbs to be the actual soruce of light which was an annoyance but was easy to fix by using fixed lights which are just below the model so that it looks like the light is still coming from the bulbs even though it is not.

Jamie A. Environment Floor Carpet and Wood Textures.

Like before with the walls the floor sections made use of a flat plane texture and as such this does not require much in the way of discussion.

Floor_Carpet

To start this off lets look at the carpet now the carpet was the first floor section created and was at first going to be all across the floor but after talking with the group we decided upon creating two floor sections it was going to be at first four but it did not look good unlike using two sections so the two floors stuck.

for the carpet I wanted a material that looked like a carpet but was not an actual carpet as such a thing would be most likely very high in polycount and so I started to look at some plastic materials and eventually came across this one and with some tweaking and modifying i was able to turn it into a carpet or as some in the group said a roll on surface that is made of a rubbery material but regardless of whcih both of these ideas actually work rather well as from personal experience their was such a material common within a nursery I visit during high school and though the age range is higher for this group in this environment such a material would still be good and as such it being either a carpet or rubbery material is fine with me.

Floor_wood

For the next floor section I wanted to create a wooden floor but just having bare wood would be a terrible choice as splinters could form which can harm a child and as such I decided to create a fake wooden floor using those lamenated floor sections that have a wood texture printed onto them this was a more logical idea as this would allow for a surface which is smooth so as not to harm the children but also a material that is easy to clean off.

To make this I first used a wooden material as the base luckly substance painter has a material that perfectly fits the idea and so I used it as a base after I tweaked it to be less reflective and to have a darker colour to it, once that was done I then started to hand paint onto it the black lines that can be seen I did this because I wanted to give the wooden floor some depth and make it look like it was put togeather piece by piece and also to help break it up more for this I used a paint tool within substance painter and a key command that allows for a line to be drawn so I clicked on one side and then highlighted a path to the other side and applied it I then repeated this process to the smaller lines to help split up the panels more.

In the end I felt the wooden one came out better and it looks very to me with how little was actually done it this both surprised me and made it feel better in creating it, and when I combined the two floors and included the floor buffers between them I was more content with how it looked and how the well the three parts work togeather.

Jamie A. Environment Wall Window and Window Pane Section Textures.

For this ill be putting three parts togeather as they all revolve around giving the room its walls, the basic wall section models where fairly simple to make as they were quite literally a flat plane with nothing special added onto them this is because the player will be not seeing the other side of the wall and having a rectangle their would just be a waste of polygon count so for that a plane is more than enough.

Wall

For the basic wall I wanted to give it a three tier sort of colouring as I felt this helped to break up using the exact same colour for three of the walls and by using more than just one colour this was achieved in a nice manner.

Using a mix of materials and hand painted I was able to create a wall section which looks a little aged with the wall paper start to form air pockets within the wall but still functional and as it is a child room being able to spend money upon toys and items that children will use is abit more important than some walls starting to show their age slightly, with the base of the model I then painted on the blue and white sections I wanted to do this by hand because I wanted it to feel like the people who work their did it themselves so the white line is not completely straight in some areas. in general it looks good I can see problems though later on when I started to create the room but they where minor at best so I decided to keep it.


Window

The next part the window frame was made from a rectangle, though this was not needed as most of the walls have been deleted outside of the ones that will be seen and using a plane would have been just as good.

For the texture of the window I decided to go with metal personally I like the look of metal window frames as they look very secure and would be very hard to break them they also are alot easier to clean so if a child was to draw upon one it would require less time.

For the texture it was a simple mix of a metal material and then drawing by hand a black line around the middle of the frame this helps to give a position to where I will be placing the window pane and will also help to make it look like it is the rubbery part that goes around the edge of the pane sealing it into place.

Window_Pane

Finally the widnow pane now for this I decided to using a flatten rectangle model as this helps to give it more depth, I also decided to split it into two sections one the top part which would be clear and for someone to look though and then the bottom part which would be opacted so as to make it hard to see though, this was two fold firstly it allows for natural light to enter the room but also it means I dont have to model an outside world as the player will not be able to look out their.

But the look of the foggy glass in the game engine is fairly strange and so far experiments with it have not been terribly successful but it does do as was asked which is prevent the player from looking out while also still giving them some light into the room so it is not a complete failure yet though a solution to the problem will be found.

Jamie A. Environment Floor Buffer Model and texture.

While designing the floor of the room I started to come across a problem where I could not either make the floor parts align correct or that the ends of the floor sections did not fit one another, now as the floor was going to be designed with four sections in mind (which has now been reduced to two as it works better) I had to come up with a method of making them fit togeather but several of the methods I tried did not work very well and so I came up with this idea of using a floor buffer that splits the two floor sections up so that they do not have to align correct and can work well togeather.

Floor_Buffer

with this being a floor buffer this allowed for the use of a plane model which I increased the number of faces on so that I could give it a rounded top so the middle section is higher than the edges and it forms into a small half circle I then pushed the middle part down so that it created two smaller bumps along the edges of the new higher part this made it look more interesting as before it was just a simple plane with a raised part in the middle.

Floor_Buffer_Textured

As this was going to be the exact same colour no colour seperating was required and so I could go straight onto texturing, for this I decided to go with a rubber material this fits the object as its designed to be placed over the gaps between floor sections so making it rubbery makes it easier to lift up if need be, gives it a good lifespan and if a child is able to pick it up they wont damage it as easily plus with it being rubber it is a softer material.

With the base of the object being rubber I went into adding several lines to the model which can be seen via the four black lines these at a distance look like they actually have depth to them but actually are just painted on lines, this is thanks to the use of shadows and other more complicated calculations that the texturing program substance painter does to allow for a method of adding more depth to a model without actually adding any to the model itself this is both an effective time saver and method of reducing polygon count.

In the end I like this it is very simple but also effective in its role and though it does not do a large amount it does enough to make it highly useful in the creation of the room.

Jamie A. Environment Door Model/Texture

With a good amount of the general envionrment created its time to move onto the outer parts of the area so the walls, floor, roof and such and to start this off will be a look at the door.

Now as the environment will be a singular room the need to have a functional door is not required but the need for one to be within the environment is rather important as not only does it provide more to the area it also gives reason as to how to enter the room which might not seem like much of a problem but it can cause people to think about such things in the back of their mind.

Door_Blockout

The creation of the door followed the similar paths to the previous objects starting with a rectangle and then using a mix of extruding tools and shrinking faces to create the effect shown above with the outer area which is coloured in red being the frame of the door the blue part being the actual door and finally the creation of a door handle which in this case is a cylinder that has had the back part of the object extruded and made smaller so as to give it a basic handle look and then finally it was simply placed against the door.

Door_Textured

With this object I wanted to try and experiement more with wooden materials as I felt it made more sense with the door as alot of doors tend to be made of wood or of a similar looking material though their can be metal and plastic ones as well but with the amount of plastic and metal that is present within the room already I decided against that.

Using two different materials for the door I decided to go with a more wooden look for the frame and a painted wooden look for the door itself this helps to give the door a better looking design and to help it stand out a little more within the room, finally I went with a copper like handle now this seems a little old for such a door but I liked how it looked upon it and so decided to keep it.

With the texture done I imported it into the room to see how it would look and it looks pretty nice the white colour of the door required some tweaking though as the room lights where causing it to be to bright but with some tweaking of the settings within the game engine it was brought back down.

Jamie A. Enviornment – Race Track Model and texture.

The final asset is the race track which will be in a section of the map, its creation was a mix of being easy but also difficult in some regards as while the creation of the parts was easy making it all connect up was abit more of a challange as I was bending the parts myself instead of using other methods which would have done it more easierly but I did not know about or have a good understanding of.

Toy_Car_Track

As this is all of the same material and colour their was no need to colouring it in before taking it over to substance painter.

Toy_Car_Track(Textured)

The idea behind the colour and material was from the earlier forms of hot wheel car toys which used thin plastic tracks to allow the person to create tracks of different styles forw which their little cars could be pushed around on with the use of little devices that push the car with large amounts of speed.

This idea fitted the track that was created but instead of little toy cars its more designed for larger ones that can be moved on its own by the child or via an inbuilt motor but in effect the raised area in the middle of the track helped to keep the toy secure within the track and as such the child could apply alot of preassure to the toy and not worry about it being flung off, the look of the track as well is one of a fairly cheap material as the idea was that these kind of things will break eventually and so the adult can but several lots of them and keep them in storage and replace it with ease.

Jamie A. Environment – Lego Piece Model and texture.

This part was again fairly simple to do but that is what lego is in general its simple a small brick which has the ability to connect to other bricks as such its creation is fairly simple with an extruded bottom part and six cylinders placed along the top of it, but this allows for the ability to then create an object out of these pieces.

Lego

As can be seen here this is made of about thirty lego pieces and is an example of what can be done with the parts they can also be enlarged and shrunk to allow for a large combination of different designs and ideas to be used what with it being lego.

Lego(Textured)

As this is lego a simple texture was all that was needed but this also allows for again the ablity to make several different colours of it and so expanding the actual number of models their are while also fitting with the idea of lego and how children wont be using just one colour to make their creations.

Jamie A. Environment – Toy Chest Model and Texture.

The next item rather a fun one to make it was easy to create but with how it was created that was fun part using a rectangle I extruded the sides of it to bring it out slightly and then extruded the newly created edges out so that they where bigger than the orginal rectangle this both provided a means of giving the chest a pair of legs for it to sit on while also helping to make it look unique.

Toy_Chest

After that the top of the rectangle was extruded again to create the hole for the chest so that items can to stored in it if it is desired, finally three cylinders were placed along the back of the chest to act as hindges for the lid which is a very thin rectangle and and base was done.

Toy_Chest(Colour_Blockout)

With the base done the colours where added The sides where a different colour to the middle part as I wanted to make the middle area more plastic like and the sides have a wooden texture to them.

Toy_Chest(Textured)

The lid and middle section are both made of the same material so a plastic like material while the dges are made of a wooden material as I said before, this makes it look nice and it rather fits it nicely, the last thing I did was to texture the hindges with a metal and reducing the shinyness of them to make them more dull I then manually drew several lines along each of the hindges to help give it the look of an actual hindge so each part looks like it is seperate and it looks nice for how simple a method it is.

Jamie A. Environment – Round Table Model and Texture.

The next asset is a little different from the other ones as this was the first one I had textured as such I was still experimenting and tweaking some things.

Round_table

The base of the model in a simple thin cylinder with four sqaure legs sticking out of the bottom of it this allows for an effective table, but then I started to include beveling along the edges of the table and legs this helps to give it more detail and look more rounded which for a table that will be used for children is rather important as this helps to prevent pointed edges which can harm a child as their bones tend to be softer at a younger age and a pointed edge could be enough to crack said bone so a more rounded edge which is supported by a substance that can help to cushion the blow will help in ensuring such an injury does not happen.

With the legs they where beveled slightly to help flatten the edges and the bottoms of them legs where enlarged slightly giving it this tapered look which in a real sense will help to keep the table from flipping over in a cheap and effective manner.

Round_table(Colour_Blockout)

It was at this point where I rather went wrong instead of combining the parts and then colouring the individual parts I instead kept the leg and table seperate and coloured them now this is not a big problem it just means that when placing the table in the game engine it will have to be constructed instead of just simply grab and drop and then dropping the complete texture onto it instead it will be grab, drop, construct and then drop the textures onto the parts.

Round_table(Textured_1)Round_table(Textured_2)

With the colouring done though the texturing could start, now as was mentioned before the table has a bveled edge making it rounded but during this I also talked about how a substance is applied to the edge to help dampen it now their are several methods of doing that from hard plastic to rubber and in this case a rubber material was chosen now rubber is a good material for dampening such an impact but its also a material that can sometimes have impurities in it as such it causes imprints and the like to appear which is an idea I used in the material causing it to become slightly bumpy and like it has been used.

The legs on the otherhand I decided to go with a painted look with parts of the paint having worn down over time to reveal the metal under it this was a nice effect to apply to the metal and I feel if it was just bare metal it would not look as good.